Since the arrival of Instagram stories, the social network continues to add features, particularly in the form of stickers to build user loyalty. Instagram has rolled out close friends feature, badges, chat, question stickers, and more. To make the stories come alive, Instagram has also added the new music sticker to its collection.
ContentsMethod 1:Add Music Sticker to Live Photo or VideoTip 1. Add Effect to Music StickerTip 2. Change Music SectionTip 3. Change SongTip 4. Change Sticker StyleMethod 2:add music sticker to existing or newly captured photo/videoTip 5. Change song sectionTip 6. Change songTip 7. Change lyric style and hide lyricsTip 8. Change lyric colorTip 9. Change lyric duration the story Tip 10. Change the location of the lyrics Tip 11. Resize the lyrics Tip 12. Remove the music sticker while keeping the music Tip 13. How to put a song you saw on someone's story in your story Tip 14. How to add a song to a story without a music stickerMusic sticker not showing the problemSpicing up your stories
With the music sticker, you can add a 15 second song from the provided library to your photo or video. You can search songs by name, artist name, genre and even mood. The chosen song will automatically play each time a user views your story. They will be able to see the name of the song and other details. The music sticker also offers lyrics that are automatically added if available for a song.
There are two ways to use the music sticker. In the first method, you need to choose the song first and then capture a photo or video. In the second method, you need to capture a photo or video first. Then you can add a music sticker to it. You can even use existing media from your gallery or camera roll.
Now that you know the basics of the music sticker, let's start with the methods. Consider the post your guide to the Instagram music sticker, especially with tips and tricks.
Note:For clarity, I have included the tips and tricks in stages.
This method comes in handy when you spot something cool and want to record it along with the music. Now, instead of capturing the scene first and then adding music, you can start playing the music and then capture a photo or video. You can even add cool filters using this method.
To use it, follow these steps:
Step 1: Open the Instagram story screen by tapping the camera icon in the upper left corner of the Instagram home screen.

Step 2: Swipe the camera options at the bottom right to reveal the music option. When you reach it, the music selection screen opens.
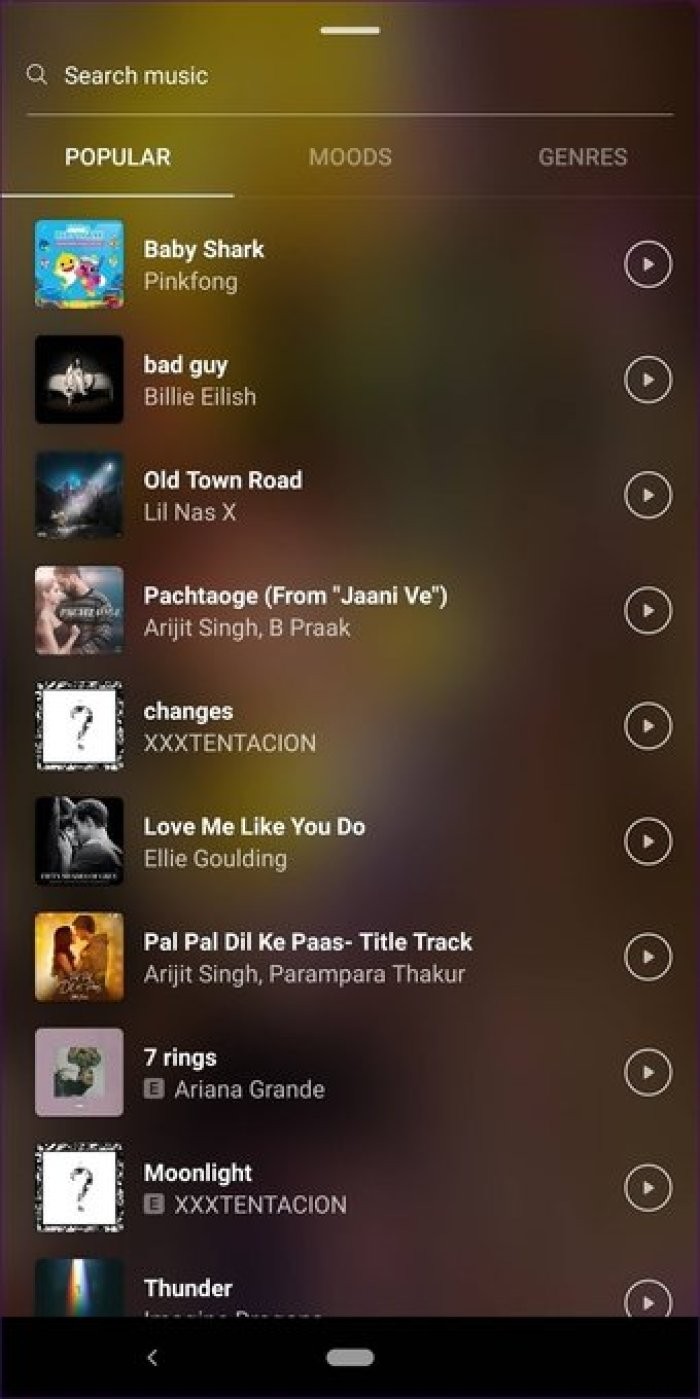
Find the song in the list or use the search at the top. Tap it to add it to your story.
Pro tip: Press the play button to preview the song.

Here are some of the tips that work exclusively for this method.
Once you've selected a song, choose an effect from the list at the bottom, such as vintage and VCR. Swipe horizontally to reveal more options.


All songs are at least one minute long. But Instagram only lets you add 15 seconds (or less) to your story. So, to change which part of the music will be played for your story, tap on the second icon at the top which has live bars.
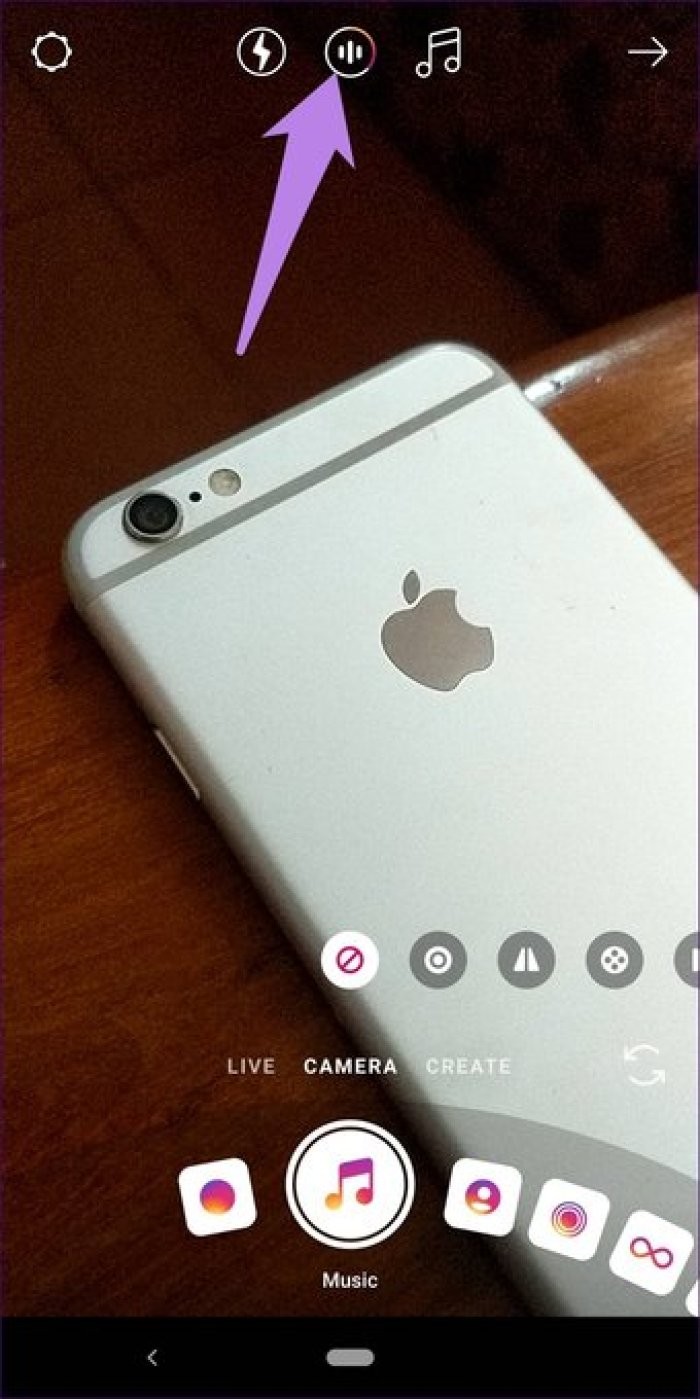
On the next screen, drag the slider to keep it in your favorite section of the song. Tap Done to confirm.

To change songs, tap the music icon at the top and find your song on the music selection screen. Tap it to add.

Step 3: Take a photo or shoot a video using the capture button.
Tip: Hold the capture button to record a video.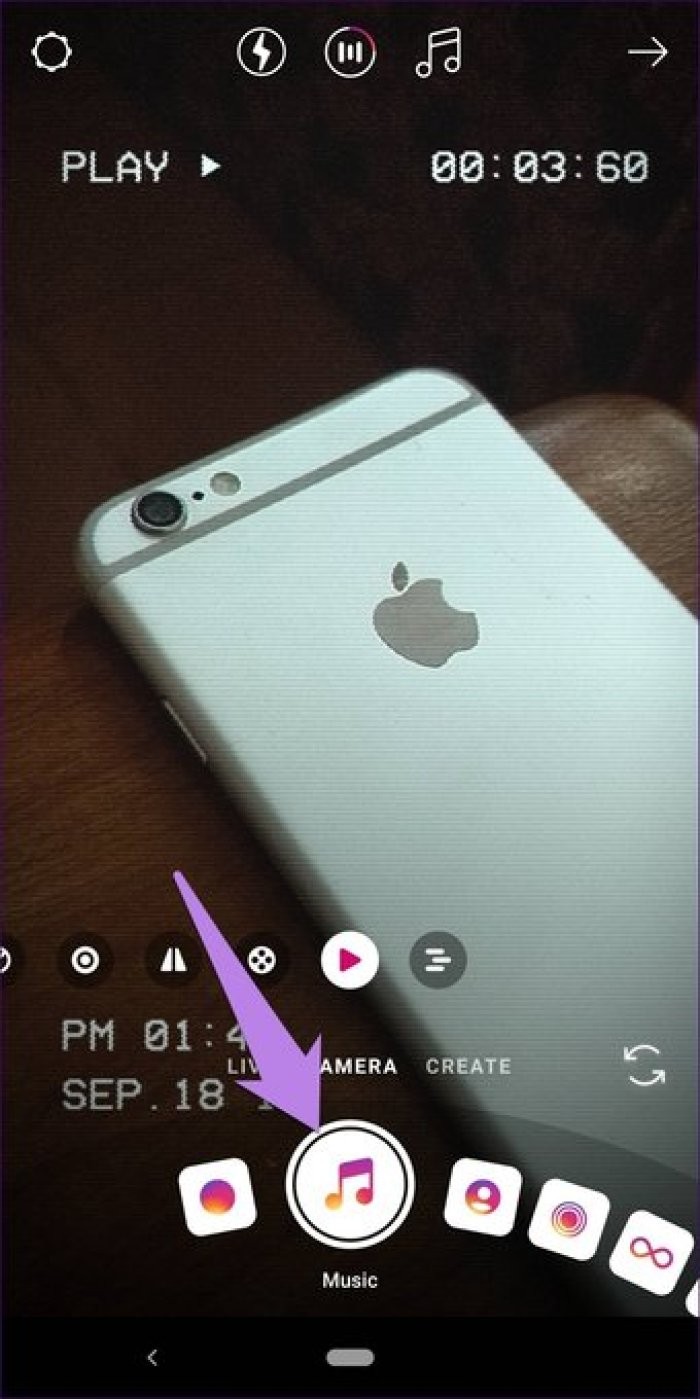
Once you've captured the scene, tap the music sticker to cycle through the available styles.


Step 4: Edit the story as usual by adding text, doodles, and other stickers. Then add it to your story.
Note: Lyrics don't seem to work when using music stickers using this method.To do this, follow these steps:
Step 1: Launch the Instagram app and go to the story creation screen.

Step 2: Now capture a new photo or choose one from your gallery.
Step 3 :Tap the sticker icon at the top and choose Music.


Step 4: You will be taken to the music selection screen. Here, search for your favorite song. Tap the song to add it to the story.
Tip: Preview the song before adding it by tapping the play icon.

Step 5 :Then the interface will take you to the music sticker customization screen. Here are some tips for using it to the fullest.
Use the slider at the bottom to select a part of the song you want to include in your story.

Don't like the selected song? No need to start from scratch. Tap the album icon at the top to choose a new song.

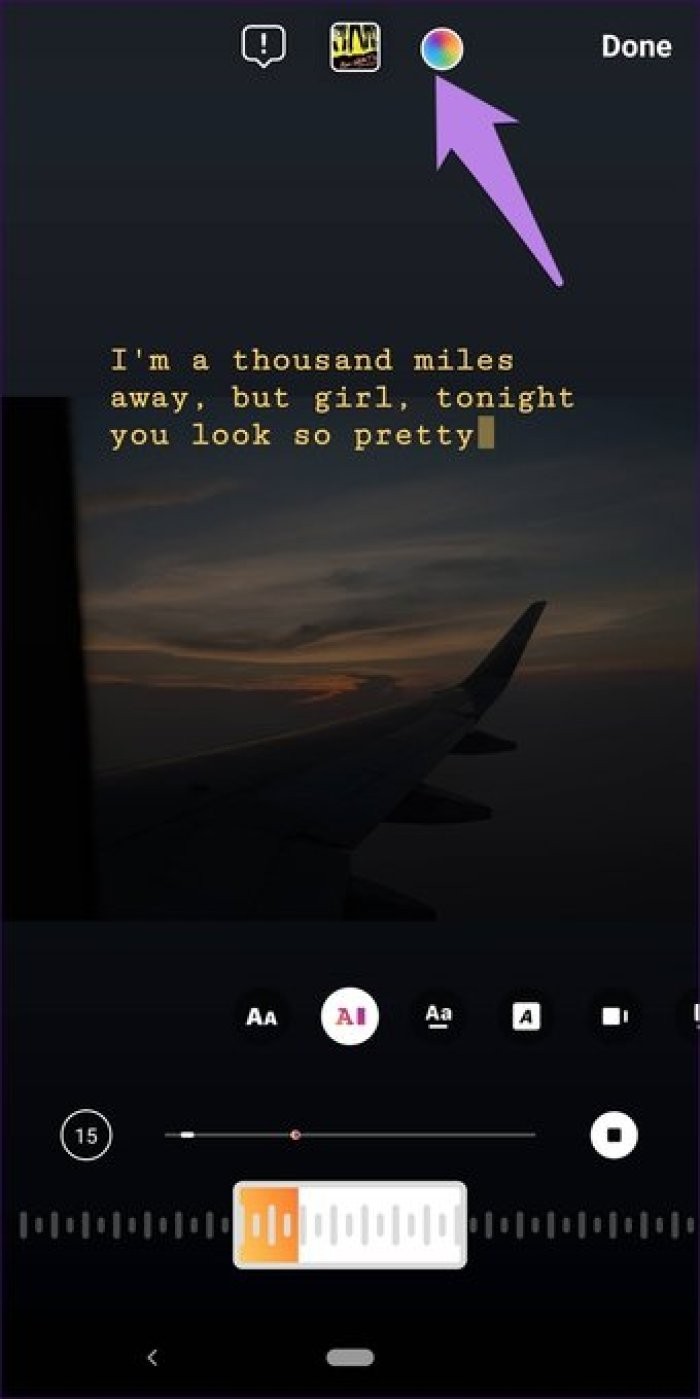
By default, lyrics are included in your story if they are available for the song you added. To change the style of the lyrics, tap on the lyrics to cycle through the different styles or choose one from the list at the bottom. To hide lyrics, use styles with the video icon. It will simply display the album art along with the song and artist name. Tap Done to confirm.


To get the right aesthetic, you can match the color of the lyrics with the colors of your image. So to change the color of the lyrics, tap the color palette icon at the top to cycle through the different colors. Tap Done to save changes.
By default, all stories with an image and a musical sticker will last 15 seconds. The length of a video story depends on the length of the video. Again, the maximum limit is 15 seconds.
You can reduce the duration in the case of static image stories. To do this, press the text 15 at the bottom then select the duration. This can last between 5 and 15 seconds. Tap Done to confirm.
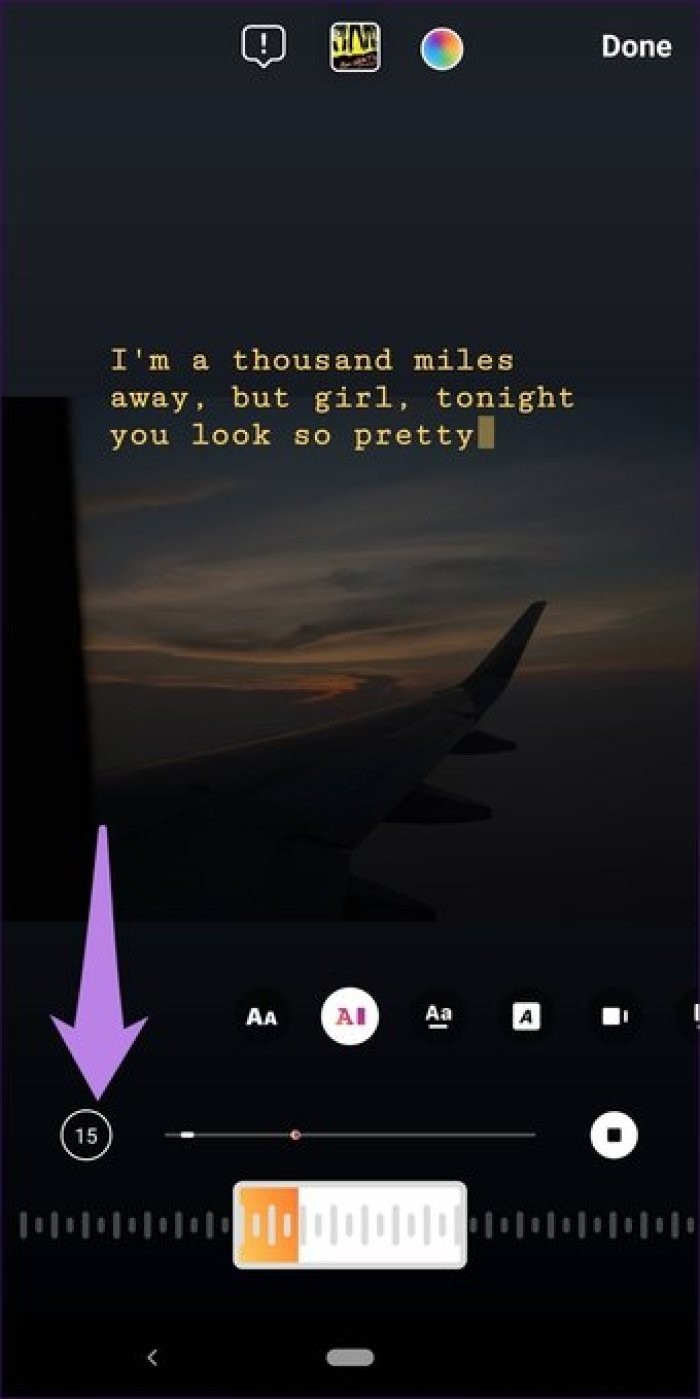
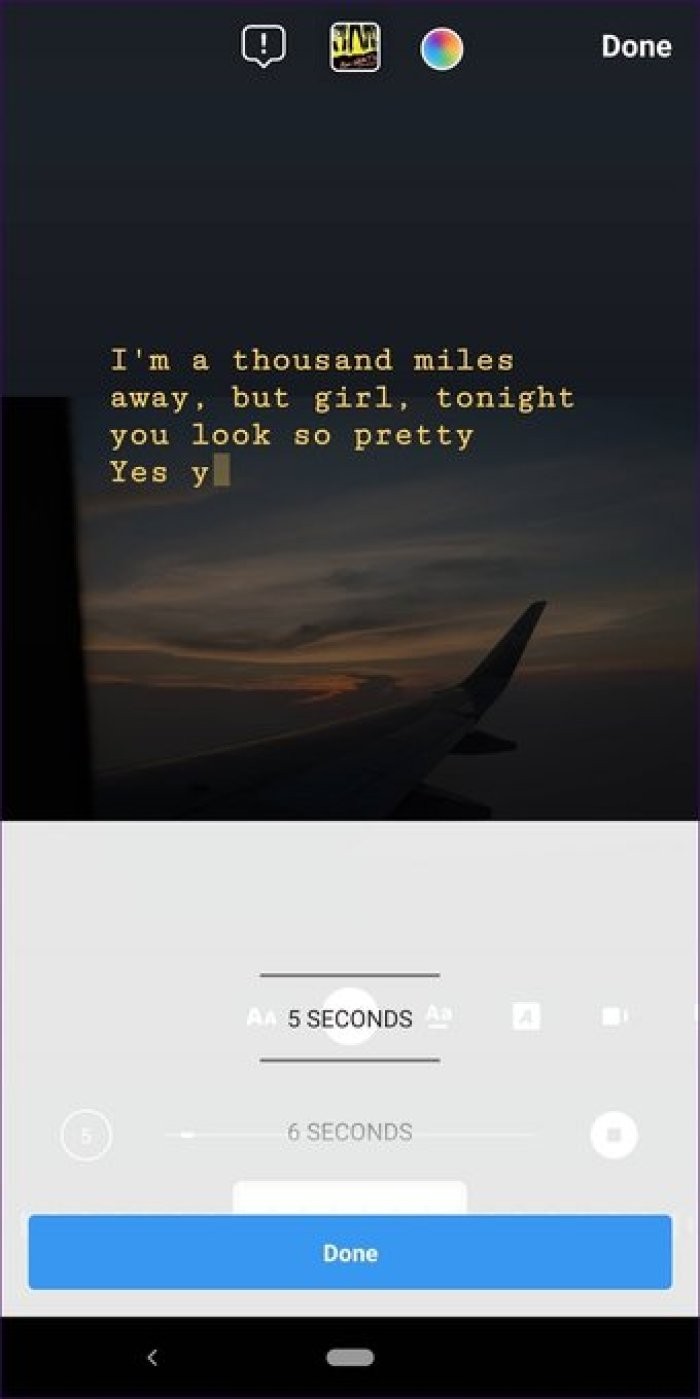
Step 6: Tap Done to enter the story editing screen. Here you get all existing story features such as doodle, text and sticker.


At this point, you can further edit the music sticker as shown in the following tips.
As with any other story element, hold the album name or lyrics and drag it to your preferred location on the story.

After placing the lyrics in the area of your choice, use the pinch gesture to resize them.

Step 7: Finally, add the story with the music sticker to your story.
Sometimes the music sticker distracts the audience from the real story. Does that mean you can't add a song without removing the music sticker? No. A workaround exists.
You need to resize the sticker to make it small so that it almost disappears from view. So technically the sticker still exists, but it's not easily visible.

As a viewer, you will see the song and artist name below the username. Tapping on album art or lyrics will also reveal more details about the song. You can even play the full song or add it to your story by tapping Try Music in your story.

If you want to add a song that is not available in the music sticker library, play it in your phone's music app. Then open Instagram and save the video. It will be saved as part of the video. Of course, this trick does not work for photos.
Similar to other stickers, Instagram is quite slow in rolling out the music sticker. It's unclear how Instagram decides who to give the stickers to and who to leave out. Yes, availability in the region matters. But many stickers including the music sticker are available for some users in the same area, but not showing for others.
As such, there is no proper solution for it. You can try updating your Instagram app and logging out of the app to recover the missing music sticker.
Note: Music sticker doesn't seem to work in Instagram business profiles.Although the music sticker may sound amazing, few things may go wrong with some users. First, you cannot download stories that contain a music sticker. This is done to avoid illegal use of the songs. Second, you cannot add your songs from the phone library. Nevertheless, it is a nice feature.
Let us know your thoughts on the music sticker in the comments below.
Then: Wondering what happens when you block someone on Instagram? Find the answer in our next article.