Part of what has made the Apple Watch so popular is the sheer amount of customization options. With housings ranging from anodized aluminum to white ceramic and bands ranging from fluoroelastomer to 316L stainless steel, there's a style for everyone. Watch faces are another customization option, and while Apple's selection is seemingly endless, users are always looking for a way to truly personalize theirs. Here are several ways to get (or create your own) custom watch faces for Apple Watch.
One of the new features introduced in watchOS 7 is face sharing. This feature makes it easy to import and add pre-customized faces for your Apple Watch. We will be using this feature through a third party app to add custom watch faces.
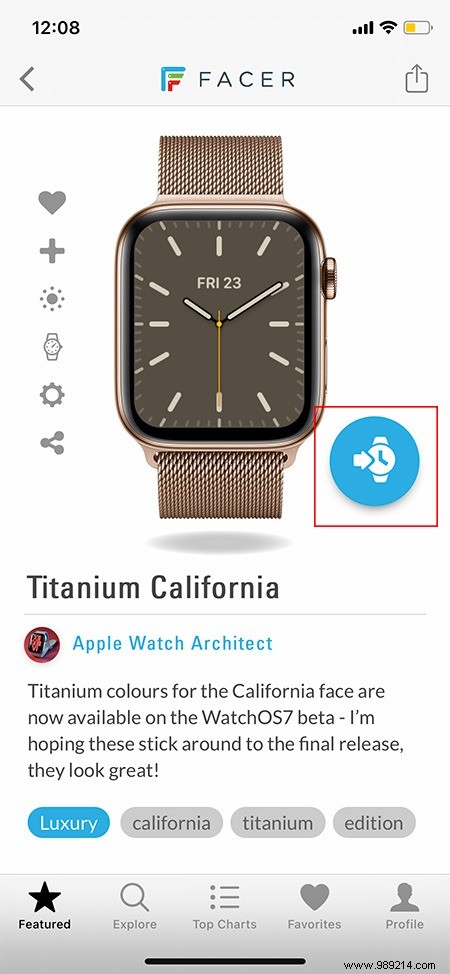
One app we will be using today is Facer. Facer is an online community where users can create and share their own custom faces. The app is free, and faces created by community members can be downloaded for free.
To get started, download the Facer app on your iPhone. You can browse different watch faces in the app, search for a particular one and see trends.

This will automatically open the watch face in the Watch app on your iPhone. If the watch face has complications from apps that you don't have installed, the watch face will let you know ahead of time. Press the “Continue” button.
Likewise, some complications may require the installation of new apps on your iPhone / Apple Watch. You can choose to install them directly from the Watch app or not to install them. If you skip them, the complication will display a blank space instead. If you want to install it, press the “Get” button which will allow you to install it directly from the application (without having to access the App Store).
Once the process is complete, tap the “Add to My Faces” button.

You will now see your dial added to the end of your “My Faces” section. As the most recently added watch face, your Apple Watch should also automatically switch to it.

To further customize the watch face, press and hold on your watch to add/edit complications and more.
Another app you can use to customize faces is Mr. Time.
Mr. Time takes your case and band colors into account so the on-screen graphics match perfectly. You can select a design and customize it further with colors, text, and graphics, or start from scratch. When you are done, you can save your design or select categories and share with other users.

I'll be using Photoshop, but something like paint.net or GIMP will do just fine, as all the steps are similar regardless of software.
First:Use the appropriate dimensions when setting up your project based on your watch case size.
Keep in mind that the display is Retina, so you'll want to use as high a quality as possible to get the best result. This applies to import and export.
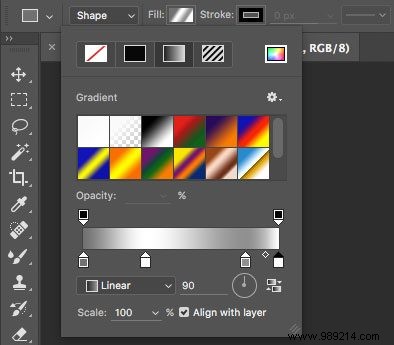
Configure your project with the dimensions defined above and let's get started. I will use the dimensions of the 42mm model, as it fits my watch. Select the Rectangle tool from your toolbox and use a solid color or select a gradient. I selected the four color gradient with white and gray.

Drag the rectangle to fill the space of your project. Make sure the properties are as they should be and the gradient colors are what you expected before placing it. To place, press the Enter or Return key.

From there you can export if you want, but I'll add a graphic.
Once I dragged it I realized it was pixelated around the edges. Fortunately, I have an easy solution.

Place the image, then right-click on the layer and rasterize the object.

Select the blur tool, maximize the pixel size (so it covers the whole project) and change the hardness to around 5%. Click your project multiple times to apply the blur. Change the hardness according to your result and undo if necessary.

Once the blur is applied, you are ready to export! If you like the one I created, please save it and use it.

To get the face on your watch, AirDrop, email, drop the file in iCloud Drive, or use other means to add it to your camera roll. Once on your iPhone, open the Watch app, select Photos, and select "All Photos" as your synced album.
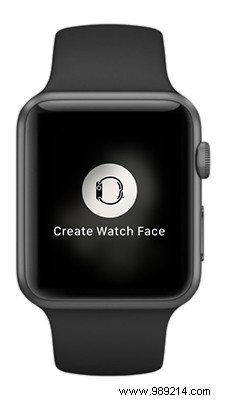
On the Apple Watch, open the Photos app, select the image and force tap to select “Create Watch Face”.

You can then force tap again to change the orientation of the time and date, as well as add a complication to the watch face.
There are tons of customization options for Apple Watch. Besides adding custom watch faces, you can also use Siri to perform most functions.