Plex is a wonderful piece of media server software that lets you stream your movies and TV shows directly to any Plex client. Plex clients can be a page in a browser on a computer, an app on a tablet or phone, an Android TV box, or even an app on your Smart TV. In any case, the server software is neat, flexible and fast, and it keeps your collection of movies and series well organized and accessible. In this article, we test the feasibility of creating and building a standalone Plex server from a Raspberry Pi 4 and a hard drive.
ContentsWhy the Pi 4?Creating the Pi Plex ServerPreparing the PiInstalling the Plex ServerBreaking out the popcornThe Pi 4 is your best bet when building a Plex server. The reason for this is purely a matter of speed. First, it's a very fast little computer, almost at the level of a low-end laptop. Second, it has fast USB 3.0 ports for connecting a hard drive to store movies. Video streaming is all about data rate.

First, install Raspbian on the board. You can get it from the Raspberry Pi download page. Download the image and burn it to the SD card with suitable software, like the excellent cross platform balena Burner, for example.
Install the SD card in the Pi as usual and boot it.
Once you get a command prompt, enter the ID like pi and password as raspberry to connect to the Pi.
Now you need to prepare for the installation and to do that you need to make sure the Pi is fully up to date. Type the following:
sudo apt-get updatesudo apt-get upgrade
Say yes to everything. You should probably reboot, so when it comes back, enter your username and password again.

Now you need to download the correct repository containing the Plex Server for Raspberry Pi Linux. To do this, first install the https download transport for APT with the following command:
sudo apt-get install apt-transport-https
Before we can download the Plex repository, we need to add the Plex GPG key or "PlexSign.key" to the repository with the following commands:
curl https://downloads.plex.tv/plex-keys/PlexSign.key | sudo apt-key add-
Now that the key has been added, we can download the server software with the following commands:
echo deb https://downloads.plex.tv/repo/deb public main | sudo tee /etc/apt/sources.list.d/plexmediaserver.list
Once done, you need to run the update command again to refresh the Pi:
When this is complete, we can finally install the server software on the Pi.
Installing the software itself is quite simple. Just type:
sudo apt-get install plexmediaserver
And if the rests are in place, it should settle easily and normally. Now you need to ensure that the IP address on the network remains static. To do this, you must first find out what the current IP address is, then edit the "cmdline.txt" file to reflect that.
Find your current IP address by typing:
hostname -I
In my case, this returned a response of "192.168.0.53". Your mileage may vary. Your network may be using 192.168.1.x addresses. It all depends on your router.
Now open the "cmdline.txt" file and edit it. Open the nano editor and file by typing:
sudo nano /boot/cmdline.txt
and add the line:
ip=YOUR IP
at the bottom of this file and save it with Ctrl + X . (Answer "O" to the prompt.)
Now type:
reboot
and your Pi will reboot. You're all set up and the Pi can now run the Plex server without a header, so you don't need to have a monitor plugged in. Use your Plex client or connect with a web browser to port 32400, like this:
where the first part is your IP address, as above. It's mine - you'll need to replace yours.
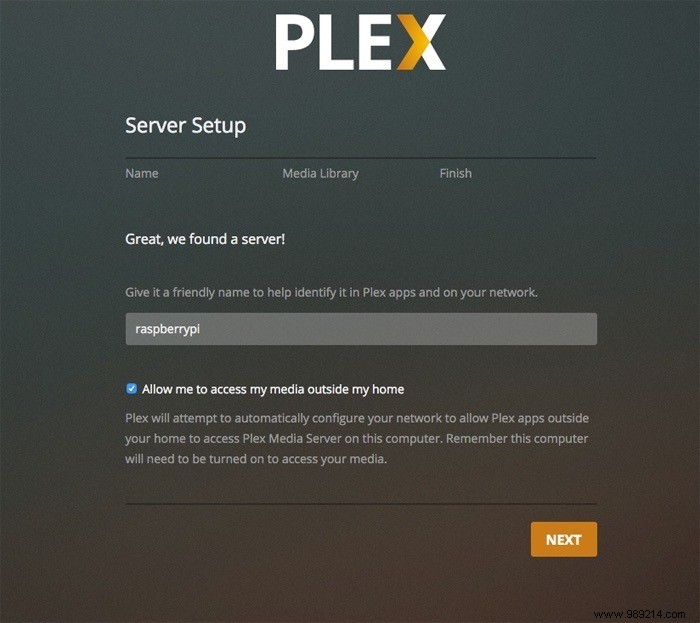
Either way, if successful, the server will appear as one of the choices.

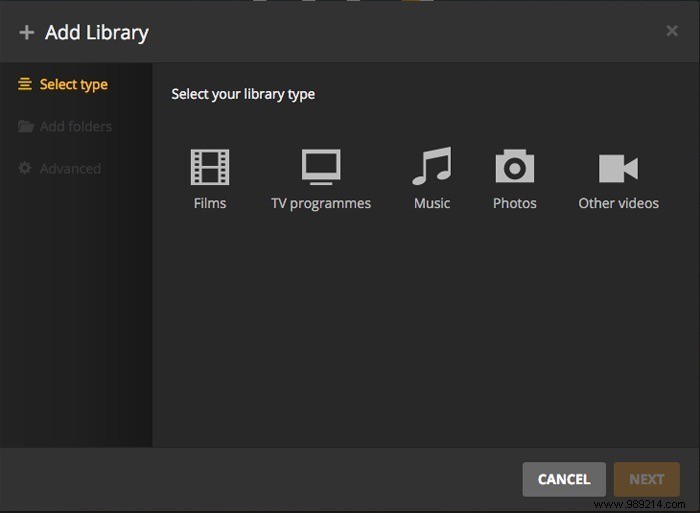
Then you can finally add the library from your media files to disk. Choosing a library of Movie or TV types changes the way files are organized in the database.

A few things to note:I've seen tutorials on this topic that say you need to change your username to Plex for this to work. It is not true; go with the default settings.
If your movie and TV files are on a USB stick and the USB ports are mounted, then you should be good to go. Be warned if you have a lite version of the OS (as I did) you may need to manually mount the USB drives. Better yet, edit the "/etc/fstab" file to mount them automatically.
This doubles if you're using an external USB hard drive; you will need to format it and mount it on the system. There are all kinds of drive types and operating systems, and all the other info you might need on that can be found here in our previous article on building a NAS with a Raspberry Pi.
Also, you can hot-swap drives on the system if, for example, you want to add files to them, but you need to make sure they're mounted again for the server to access them. The Plex database will automatically update once the drive is seen by the system.
If you have any questions about building your own Plex server, please let us know in the comments.