Although there are many ad blockers that can banish ads from your laptop or computer, they rarely work on other devices, such as smartphones and tablets. This article will show you how to turn your Raspberry Pi into a network-wide ad blocker, using Pi-Hole. Once done, you will be able to block ads on your laptop, computer, smartphone, tablet, and any other device connected to your network.
ContentsWhat You'll NeedInstall Pi-Hole on Your Raspberry PiGoogle, Cloudflare, OpenDNS:Choosing a DNS ProviderWhich Blacklists Should Pi-Hole Use?Internet Protocols:IPv4 or IPv6 (or Both)?Set Up a Static IP Monitoring Pi -Hole with web admin interfaceSaving Pi-Hole dataSigning in to your Pi-Hole accountTroubleshooting:Unable to resolve hostUpdate your router:Create a network-wide ad blockerHow to block online ads on specific devices1. Windows2. Linux3. macOS4. iPhone5. androidNote :to start, you can consult this article on what is Pi-Hole and its usefulness.
To complete this tutorial you will need:
Once you've assembled your tools, you're ready to build your network-wide ad blocker.
If you haven't already, connect your external keyboard, monitor, and other peripherals to your Raspberry Pi, then connect the Pi to a power source.
As soon as your Raspberry Pi boots up, you're ready to download the Pi-hole install script. Simply launch the Terminal (by clicking on the Terminal icon in the Raspbian toolbar), then type the following command in the Terminal window:
curl -sSL https://install.pi-hole.net | bash
Press Enter. Raspbian will download the script and begin the process of setting up your device to use Pi-Hole.
After a few moments, the Pi-Hole configuration screen should launch automatically.

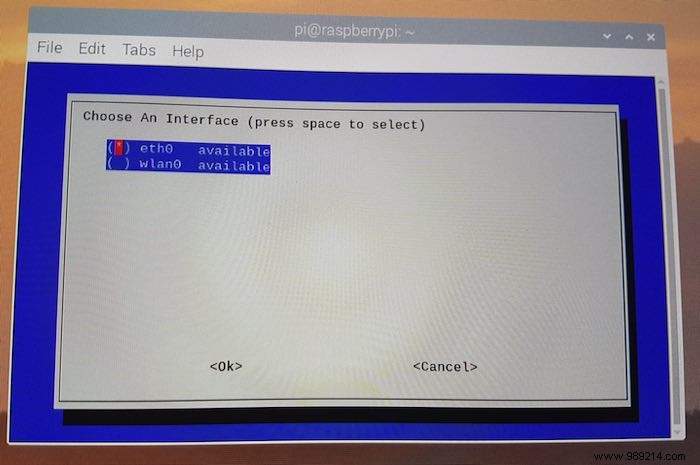
Use the arrow keys to select wlan0 or eth0 (this tutorial uses Wi-Fi) and press enter.
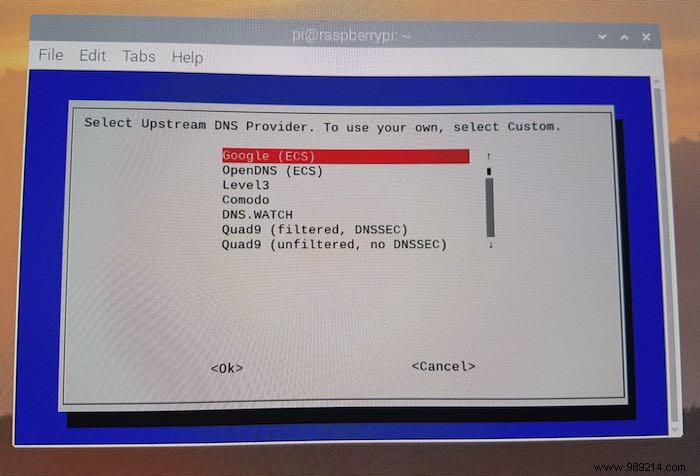
You will need to choose an upstream DNS provider, which will be responsible for answering queries for non-advertising domains.

Pi-Hole supports the following predefined DNS providers, but you can enter your own by selecting "custom".
This tutorial uses Google, but you can choose any DNS provider you prefer.
Specify which lists Pi-Hole should use to identify and block unwanted content.

Unless you have a specific reason to change these settings, it's generally a good idea to stick with the defaults.
It doesn't matter if you choose IPv4 or IPv6, but if you want to block as many ads as possible, you should leave both IPv4 and IPv6 selected.
Use your current network settings as the static address of Pi-Hole. Assuming you are happy with the information displayed on the screen, use the arrow keys to select "Yes", then press Enter.
Read the disclaimer carefully and if you agree, select "OK".
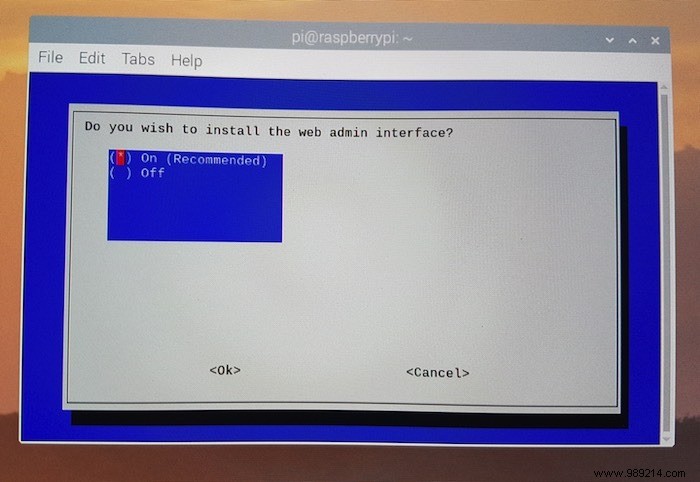
You will be asked if you want to install the Pi-Hole web admin interface. This interface provides an overview of how Pi-Hole works on your network, so it is recommended that you opt to install the web interface when prompted.

If you are installing the web admin interface, you must also install "lighttpd web server" when prompted.
You can choose to disable Pi-Hole's logging capabilities, but I recommend leaving them enabled, as they provide useful information.
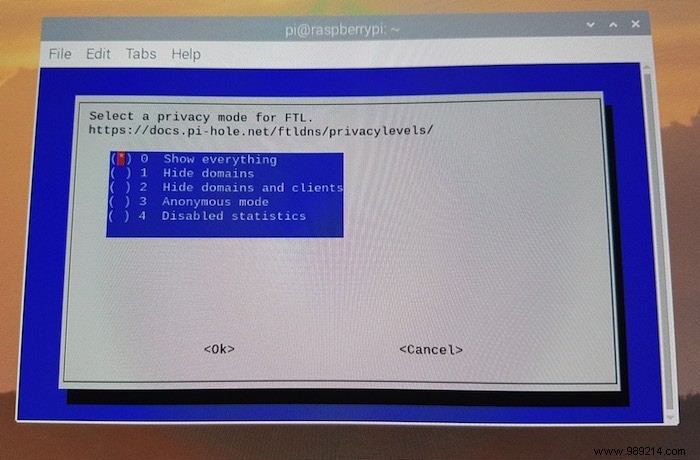
You will be prompted to select a privacy mode for FTL, which is the level of information that will be included in your Pi-Hole statistics. Choose from the following:

The configuration dialog will show the address of the Pi-Hole web administration interface and the password you will need to log in to this interface. Write down this information!
If you go to the URL provided, you will encounter the standard Pi-Hole web interface and can log in using your password.

The web administration interface is divided into the following sections:
This is just a brief overview of the Pi-Hole web admin interface. It is worth taking the time to explore this interface in more detail!
While configuring Pi-Hole, you may encounter the following error in the Terminal window:
"Failed to resolve host
FTL engine not installed . "
If you encounter this message, run the following Terminal command:
sudo nano /etc/resolv.conf
This launches the resolv.conf file in the Nano editor. You will need to add the IP address(es) of your chosen DNS provider to the resolv.conf file. For example, this tutorial uses Google as the DNS provider, so a quick Google search reveals that "8.8.8.8" should be added to resolv.conf:
nameserver 8.8.8.8
To save your changes, use the Ctrl + O keyboard shortcut, then press Yes when prompted.

Close resolv.conf using the Ctrl + X keyboard shortcut.
Launch the Pi-Hole configuration dialog again by running the following Terminal command:
curl -sSL https://install.pi-hole.net | bash
You should now be able to complete the configuration dialog without any errors.
You are ready to update your devices or router to use Pi-Hole. If you want to block ads on all devices connected to your network, you will need to change the router's DNS settings to point to your Raspberry Pi device.
The process for changing your router's DNS settings will vary depending on your exact router model, but as an overview, you will need to:
hostname -I For instructions on updating the DNS settings for your specific router, check the manufacturer's website or the physical documentation that came with your router.
You can also change DNS settings for specific devices and operating systems.
To update your DNS settings on Windows:
Your Windows PC is now configured to use your Pi-Hole ad blocker.
If you are a Linux fan, you will need to:
Alternatively, you can update your DNS settings by opening the "/etc/resolv.conf" file.
To update your DNS settings in macOS:


Pi-Hole will check all your requests against its blacklist and block as many ads as possible.
If you have an iPhone or iPad, then:
To block ads on Android:
While using your Raspberry Pi as an ad blocker, it can also be used as a Wi-Fi hotspot or personal web server. Check them out.