In Windows 10, OneDrive uses different types of badges to relay file statuses. For the most part, they serve their purpose well by letting you know if your files are either actively syncing or already syncing to the cloud. But only until you change the File Explorer view mode to list or detail, that's when things start to get tricky.

Needless to say, the green checkmarks shown on fully synced items don't quite match the tiny icons in List and Details view, making it nearly impossible to tell certain file types apart. For example, when was the last time you accidentally opened a Word document thinking it was an Excel spreadsheet?
However, OneDrive doesn't provide any built-in way to disable these tick badges — or any of the other status badges for that matter. But luckily, you use a shell extension viewer to do the job instead. If you don't like third-party apps, there is also a workaround that can alleviate the problem to some extent.
Nirsoft ShellExView is a completely free application that allows you to quickly locate and remove shell extensions related to green tick badges in OneDrive. Use the button below to download it in ZIP format or as an installable .exe file.
Download ShellExView
After extracting or installing ShellExView, launch the application with administrative privileges, then wait for a brief moment while it loads a list of all shell extensions on your PC.
Note: ShellExView must be launched with administrative privileges by default. If not, right-click the "shexview" executable file in the extracted or installed location, then click Run as administrator.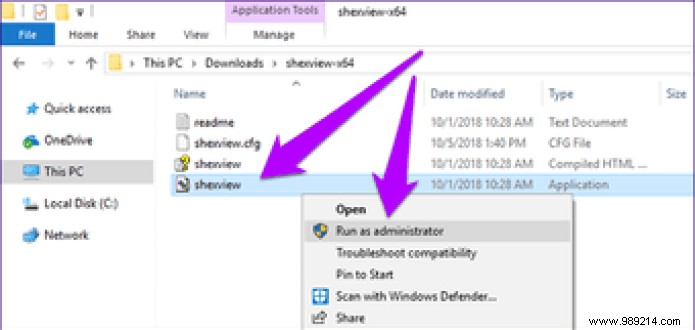
Once done, scroll down and locate the extensions labeled "UpToDateCloudOverlayHandler Class", "UpToDatePinnedOverlayHandler Class", and "UpToDateUnpinnedOverlayHandler Class".
Then, hold down the Ctrl key and click on each extension to select all three. Finally, right-click and choose the Disable Selected Items option from the context menu.
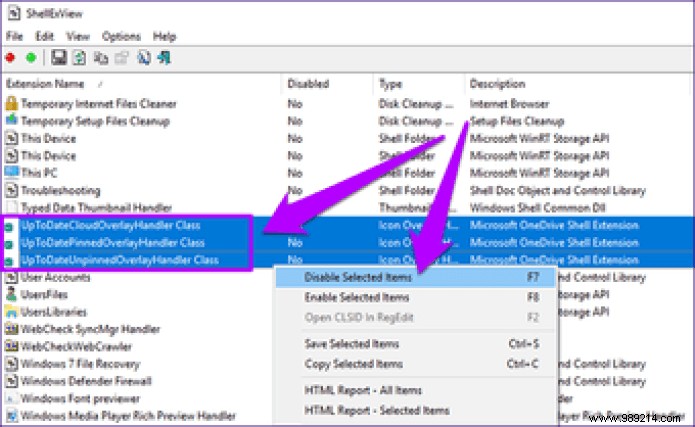
Next, exit the application and then restart your PC. Head to the OneDrive folder and you should no longer see any green tick badges. Either way, you'll still see badges related to active syncing, sharing, errors, etc., though they shouldn't be too much of a problem in terms of icon visibility.
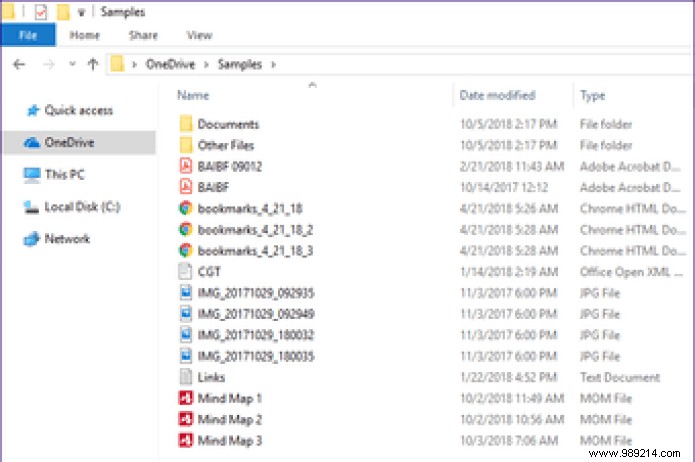 Note: To re-enable checkmark badges later, right-click the disabled shell extensions in ShellExView and select Enable Selected Items.
 If you want to get rid of any other badges in OneDrive, you need to disable the following shell extensions through ShellExView. However, it's really not recommended to do so as there is no way to identify useful statuses or potential issues that occur while syncing files.
Again, only consider disabling these status badges if you really have to. For example, disabling the "ErrorOverlayHandler Class" extension is not a good idea as you won't be aware of sync issues unless you want to rely on OneDrive notifications only.
While OneDrive doesn't provide any built-in option to remove the ticks from fully synced files, it does let you move the badges from the file icons themselves to their own separate column. To do this, you need to enable the Files On-Demand feature in OneDrive.
However, this changes the default functionality of OneDrive quite drastically. While files already synced to your computer are unaffected, any items downloaded from other devices should only appear as placeholders on your PC until you choose to open or download them.
Note: To enable Files On-Demand, your PC must be running at least Windows 10 Fall Creator Update (version 1709).Click the OneDrive icon in the system tray, then click More. In the context menu, click Settings.
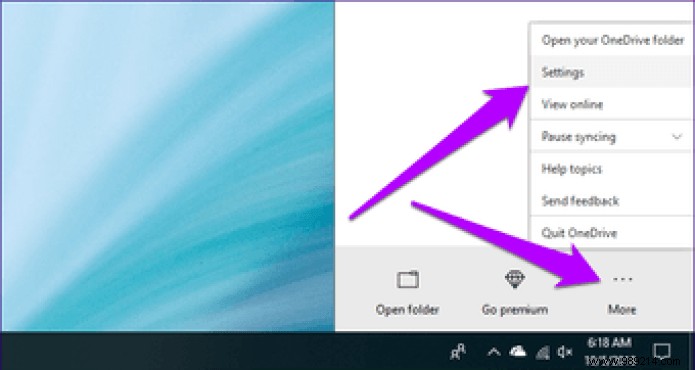
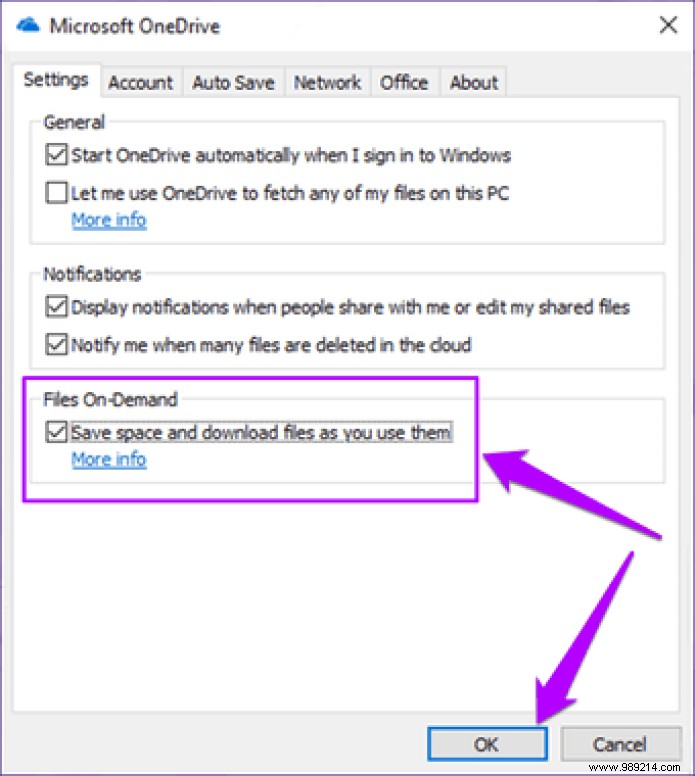
Switch to the Settings tab, then check the box next to Files On-Demand. Finally, click OK to save your changes.
Head to the OneDrive folder and you should see all the badges listed separately in a dedicated Status column. Even when using other view modes such as List or Large Icons, status badges are displayed independently of file icons.
 Note: All files downloaded from other devices should have cloud-shaped status icons. While these items download automatically upon access, you can also opt to right-click and select Always keep on this device to download them manually.
 So, you have now used two methods that you can use to keep those green checkmark badges from getting in your way. Just use ShellExView to get rid of them completely, or the Files On Demand workaround to make them less annoying. Hopefully no more confusion between file types.