If you have accumulated a collection of smart devices, sensors, actuators, and various other Internet-connected gadgets, how do you turn your Internet-connected components into an Internet of Things (IoT) project?
ContentsWhat is Cayenne?What You'll NeedInstalling the Raspbian OSMethod 1:Using the Cayenne Mobile AppMethod 2:Running Terminal CommandsTroubleshooting:Cayenne Can't Find My Raspberry Pi!1. Check your network2. Search based on IP addressMonitor your Raspberry Pi with CayenneBuild your IoT network:add sensors and actuatorsCreate a temperature triggerCayenne is a mobile application, online service and dashboard that aims to make the world of IoT more accessible. Once Cayenne is installed on your Raspberry Pi, you will be able to create IoT projects simply by navigating through various menus and selecting different buttons.
For newcomers, Cayenne greatly simplifies the creation of IoT and home automation networks, while more experienced users will be able to use Cayenne to get their projects started – skipping through all that annoying setup and boilerplate code, straight to the Good. product.
You'll learn how to run Cayenne on your Raspberry Pi, register all of your sensors, actuators, and devices, and then create a simple temperature-based trigger in this article.
Cayenne consists of the following elements:
To complete this tutorial you will need:
Depending on the method you use to install Cayenne, you may also need:
Once you have your tools, you are ready to configure Cayenne.
To install the Raspbian operating system:
1. Download the latest version of Raspbian to your laptop or computer.
2. Insert the SD card into your computer or laptop.
3. Download and install Graveur if you haven't already.
4. In Etcher, click "Select Image" and choose the Raspbian file you just downloaded.
5. Click "Select Target" and choose your SD card.
6. Etcher will now flash Raspbian to your SD card. Remove the SD card from your laptop or computer and insert it into your Raspberry Pi.
The next steps will vary depending on whether you are installing Cayenne using the mobile app or running Terminal commands directly on your Raspberry Pi.
Install Cayenne on your Raspberry Pi using the Cayenne mobile app:
1. Connect your Ethernet cable to the Raspberry Pi.
2. Plug your Raspberry Pi into a power source. The device should start automatically.
3. Download Cayenne to your mobile device.
4. Install and launch the app.
5. Tap "Open -> Create my free account" and register with Cayenne.
6. Log in to your new Cayenne account.

8. When your Raspberry Pi appears, tap on it.
Cayenne will install the libraries and agents on your Raspberry Pi, reboot your Raspberry Pi, and finally install the software and drivers. This may take a few minutes, so now is the perfect time to go for a coffee!
Once all necessary software is installed, your Raspberry Pi will appear in the Cayenne dashboard.
Alternatively, if you don't want to use the mobile app, install Cayenne on your Raspberry Pi using terminal commands:
1. Connect your external monitor, keyboard and optional Ethernet cable to your Raspberry Pi.
2. Plug in a power cable and your Raspberry Pi should start automatically.
3. Perform the usual setup, including connecting to Wi-Fi if not using an Ethernet cable.
4. Go to the Cayenne website and Create your free account.
5. Once you are logged into your account, select "Add New -> Device/Widget".
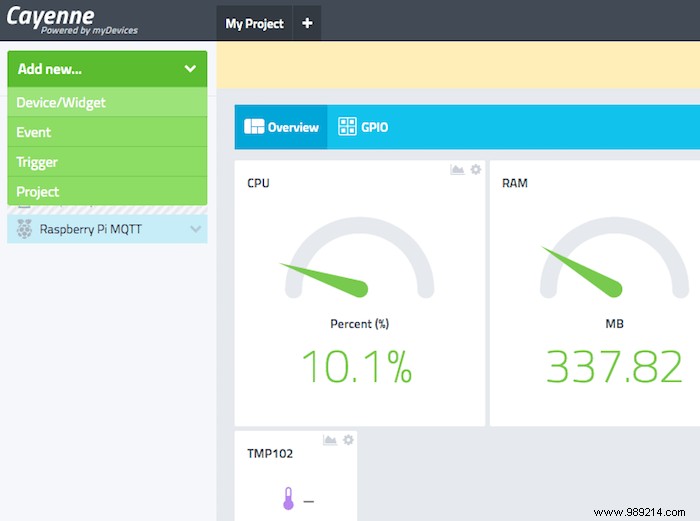
6. Select "Raspberry Pi". The Cayenne console will generate an installation script that you can use to download all necessary software to your Raspberry Pi.
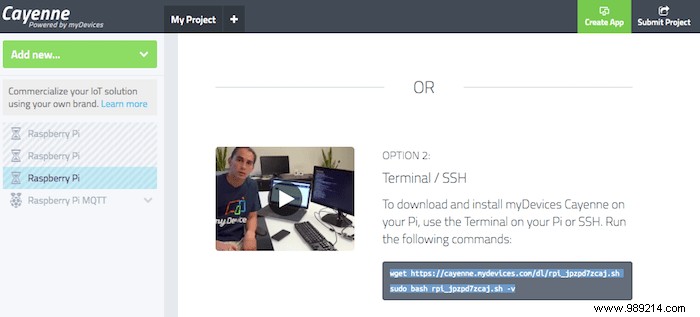
7. On your Raspberry Pi, open a Terminal window by clicking the Terminal icon in the toolbar.
8. Type the Cayenne installation script in the Terminal and press the Enter key on your keyboard. Raspbian will now download all necessary software to your Raspberry Pi.
After installation, your Raspberry Pi will reboot automatically. After a successful reboot, your Raspberry Pi will appear in the Cayenne Dashboard.
If Cayenne is having trouble locating your Raspberry Pi, then:
Cayenne can only detect a Raspberry Pi connected to the same network. Whether you're using Cayenne for Android, iOS, or via the web browser, make sure you're on the same network as your Raspberry Pi.
Whenever you search for a device, you should see a "Search with IP Address" option.

If Cayenne is having trouble locating your Raspberry Pi, you may get positive results by clicking this link and entering your Raspberry Pi's IP address.
You can retrieve this IP address by launching the Raspbian terminal and running the following command:
hostname -I
Use the Cayenne Dashboard to view statistics about your Raspberry Pi, including its CPU, RAM, and temperature.
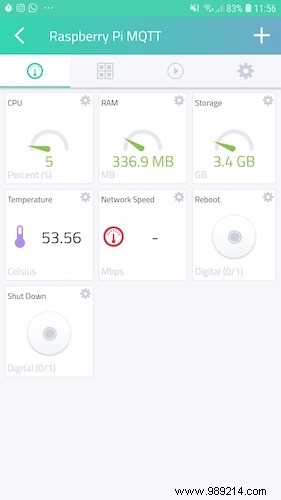
Each of these stats can also be leveraged to view data Cayenne has recorded over time, which can help you identify trends in your device's health and performance.
If you have sensors or actuators on your network, you can add these components to Cayenne, in which case you will be able to monitor and interact with these components from the Cayenne dashboard. Note that the following steps are done through the mobile application. The user interface may therefore be slightly different if you access the dashboard via the web browser.
1. In the Cayenne app, select your Raspberry Pi device.
2. Select the small speedometer icon from the toolbar.
3. Tap the small "+" icon in the upper right corner.
4. Find the sensor or actuator you want to add and tap on it.
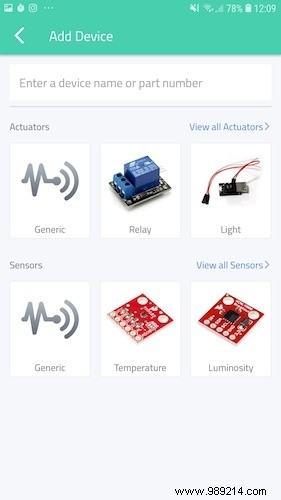
5. Complete the following form, then tap "Add Sensor" or "Add Actuator".
You can now work with this component.
There are many different tasks you can perform from the Cayenne dashboard, but we're creating a simple temperature trigger. In this workflow, Cayenne will generate a notification each time this component exceeds a certain temperature threshold, which can be useful for ensuring that components are not overheating or for triggering broader home automation workflows, such as turning your heating on and off .
In the Cayenne app:
1. Select the Raspberry Pi device you want to work with.
2. Tap the small "Play" button in the toolbar, then tap the "+" icon in the upper right corner.
3. Give this trigger a name, such as "Too hot" used here.
4. Tap the blue "+" button.

5. Find the sensor or actuator you want to monitor and press the "Temperature" button that comes with it.
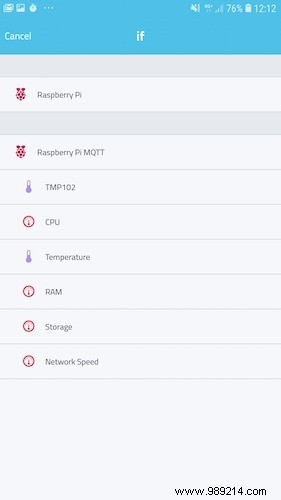
6. Select a temperature threshold.
7. Make sure "Sensor Above" is selected.
8. Press "then -> +"
9. Choose how you want to receive your notification, by email or SMS. Enter the necessary information, then tap "Done".
10. When you're happy with the information you've entered, tap the "Save" icon in the top right corner.
11. To activate your trigger, make sure the "Play" button is selected and push the slider into the "On" position.
You will now receive a notification whenever this component exceeds the specified temperature threshold.
Now that you've configured Cayenne and familiarized yourself with Cayenne's essential workflow, you can continue to add devices, sensors, and actuators, and use Cayenne to create triggers and rules for all of your IoT components. , or better yet, spin your Raspberry Pi into an edge gateway.