GIMP is a free open source video editor where people can edit and manipulate their images. It consists of plugins and extensions to do anything. The GIMP application provides filters, a special type of tool designed to take an input layer or image, apply a mathematical algorithm to it, and return the input layer or image in a modified format.
ContentsWhat is Enhancement Filter in GIMP?How to Use Filters in GIMP?How to Use Enhance Filters in Gimp1]How to Use Antialias Filter in Gimp?2]How to Use Deinterlace Filter in GIMP?3]How to How to Use High Pass in GIMP?4]How to Use Noise Reduction Filter in GIMP?5]How to Use Red-Eye Filter in GIMP?6]How to Use Symmetric Nearest Neighbor Filter in GIMP?7]How to How to Use Sharpen (Unsharp Mask) Filter in GIMP?8]How to Use Despeckle Filter in GIMP?9]How to Use Destripe Filter in GIMP?10]How to Use NL Filter in GIMP?11]How to Use Wavelet-decompose in GIMP ?Enhancement filters are used to compensate for imperfections in the image. These imperfections include dust particles, noise, interlaced frames, and insufficient sharpness. The Enhancement Filter menu provides several tools such as Antialiasing, Deinterlacing, High Pass, Noise Reduction, Red Eye Removal, Symmetric Nearest Neighbor, Sharpen (Unsharp Mask), Detach , destripe, NL filter and wavelet decomposition.
GIMP uses filters to achieve various effects and has several categories, namely:Blur Filters, Enhancement Filters, Distortion Filters, Light and Shadow Filters, Noise Filters, Edge Detection Filters, Generic Filters, Combo Filters, Art Filter, Scenery Filter, Map Filters, Render Filters, Web Filters, and Animation Filters. To use filters in GIMP, you must select the image with a selection tool, then access filters from the menu bar and choose a filter from the list.
We will explain the following topics:
This filter reduces aliasing effects using the Scale3X edge extrapolation algorithm.
Open GIMP and have your image ready to use.
Click on Filter in the menu bar, hover over Enhance and select Antialiasing .
The effect is automatically applied to the image.
The deinterlacing filter retains only one of the two images and replaces missing lines with a gradient between the preceding and following lines, especially if the images appear blurry and stripped.
Click on Filter in the menu bar, hover over Enhance and select Deinterlace .
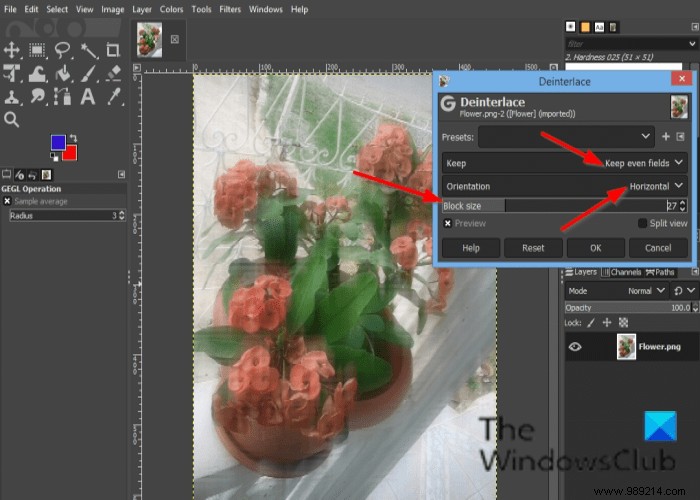
A Deinterlace dialog box will appear.
The dialog contains the Keep even fields and Keep odd fields choice; try both to see which works best for your photo.
You can also change the Orientation and use the Block Size cursor and input areas.
Check the Preview checkbox to preview your image.
Then click OK .
Open image.
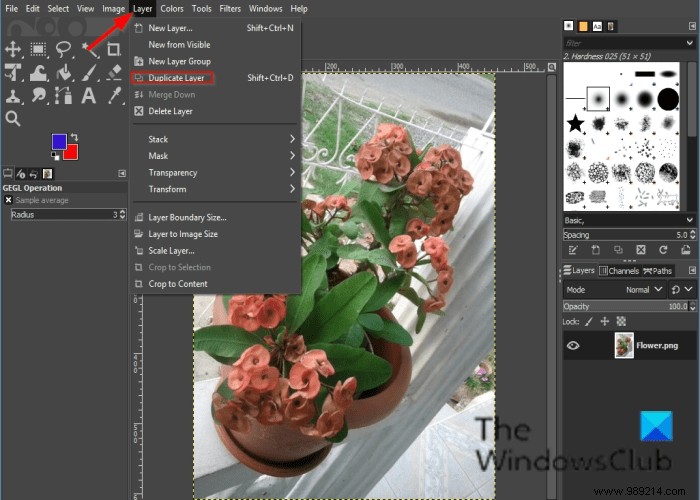
Click Layer in the menu bar and select Duplicate layer .
A copy of the layer will appear to the right of the GIMP interface.
Go to Filter in the menu bar, hover over Enhance and select the High Pass effect.
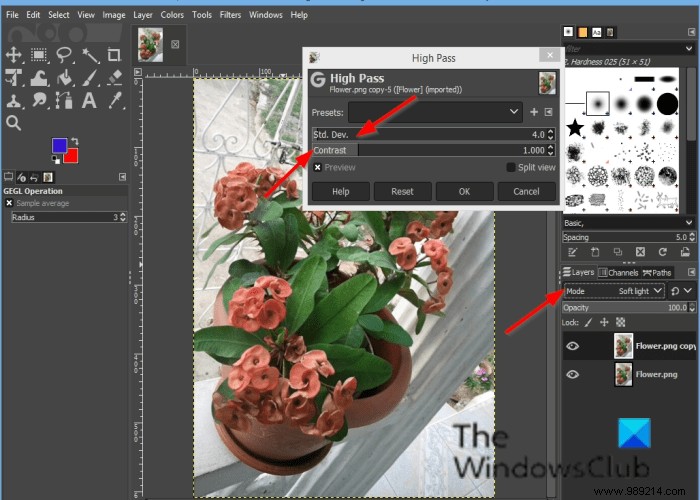
A High Pass dialog box will open.
To the right of the GIMP interface, change the mode to Soft Light; You can also try Strong Light .
Return to High Pass dialog and customize the effect of the High Pass by clicking on the input fields of Std. Dev. andContrast .
Then click OK .
The noise reduction filter is a simple GEGL filter to reduce noise.
Go to Filter in the menu bar, hover over Enhance and select the Noise Reduction effect.
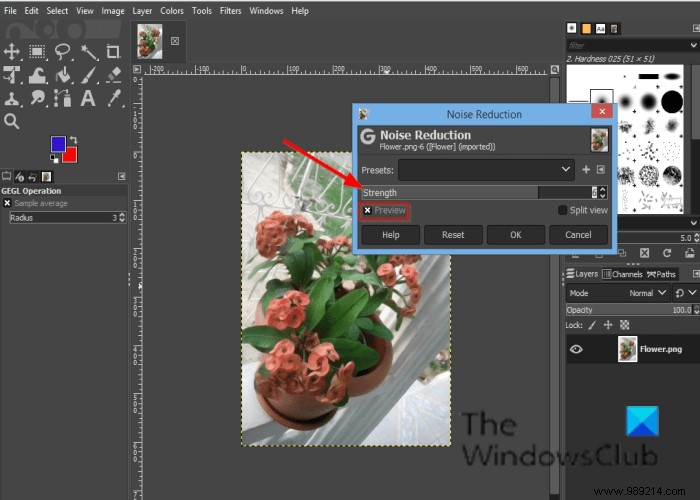
A Noise reduction dialog box will open.
In the dialog, Force reduces noise and increases blur.
Check the Preview checkbox to preview your image.
Then click OK .
The purpose of the red-eye filter is to remove red-eye from images.
Open image.
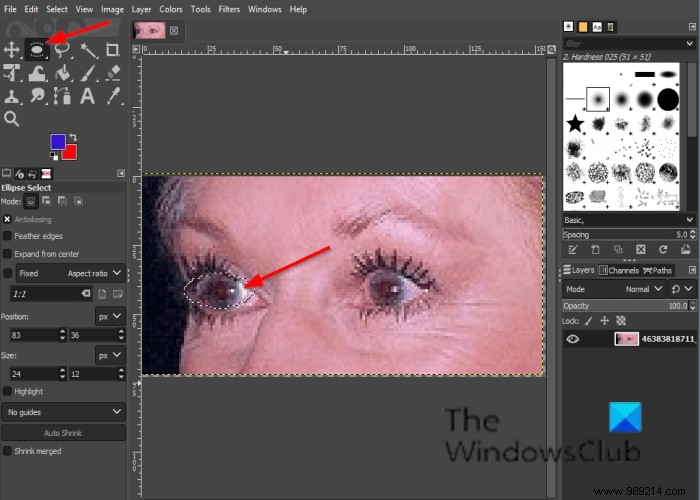
Click click either on the Lasso select or Ellipse selection tool.
If you don't see the Eclipse tool, press the E key.
Draw the selection tool over the eyes in the image.
Click on Filter in the menu bar, hover over Enhance and select the Red Eye Removal effect.
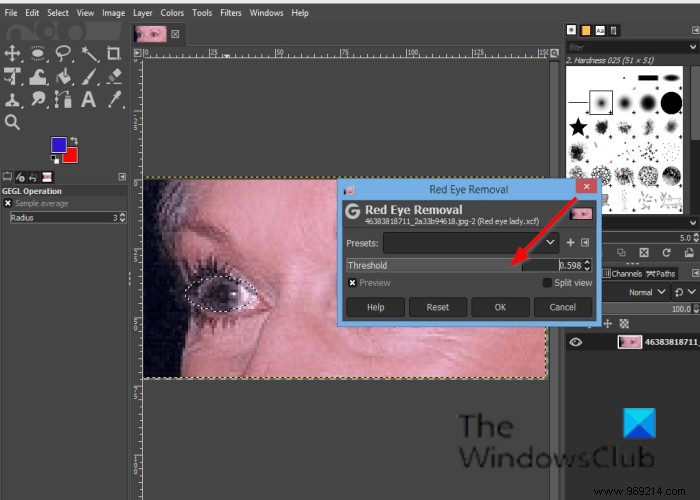
If you move the To Threshold the red color to be removed will vary.
Click OK .
The symmetric nearest neighbor effect blurs the edges of the image preserving.
Open image.
Click on Filter in the menu bar, hover over Enhance and select the Symmetric Nearest Neighbor effect.
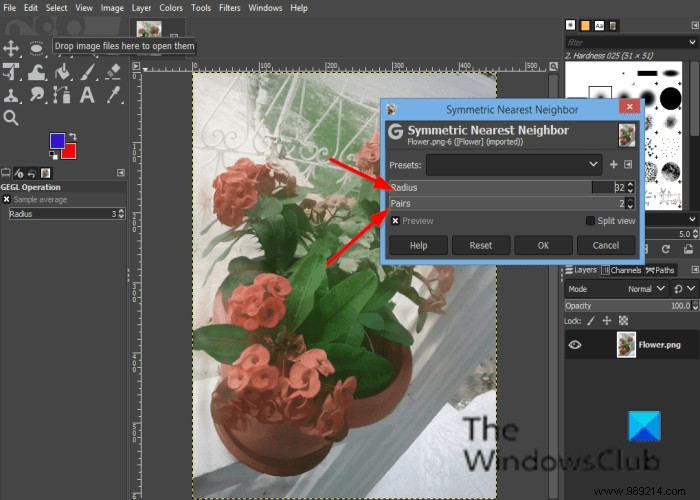
A Symmetric Nearest Neighbor dialog box will open.
In the dialog, you can increase or decrease the radius and select 1 or 2 pairs (a higher number preserves sharper strokes).
Then click OK.
Blurred photographs and scanned images often require sharpening corrections.
Open image.
Duplicate image layer.
Make sure it's the copy you want to see the difference.
Click on Filter in the menu bar, hover over Enhance and select the Sharpness (unsharp mask) effect.
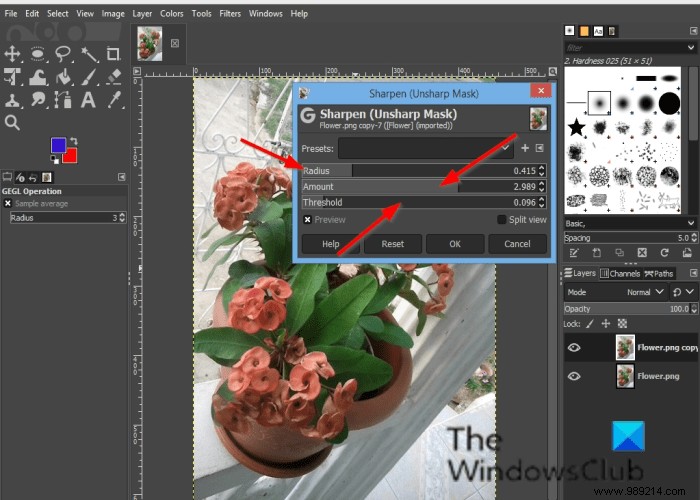
A Sharpness (unsharp mask) dialog box will open.
the Radius the slider and input boxes allow the user to set the number of pixels on either side of an edge that will be affected by sharpening. High radius images allow for a higher radius.
the Amount the slider and input boxes set the sharpness strength.
the At the threshold the slider and input boxes allow users to set the minimum difference in pixel values that indicates an edge to apply to sharpen.
Then click OK .
The Depeckle filter removes small defects caused by dust or scratches on a scanned image.
Open image.
Click on Filter in the menu bar, hover over Enhance and select the Detach effect.
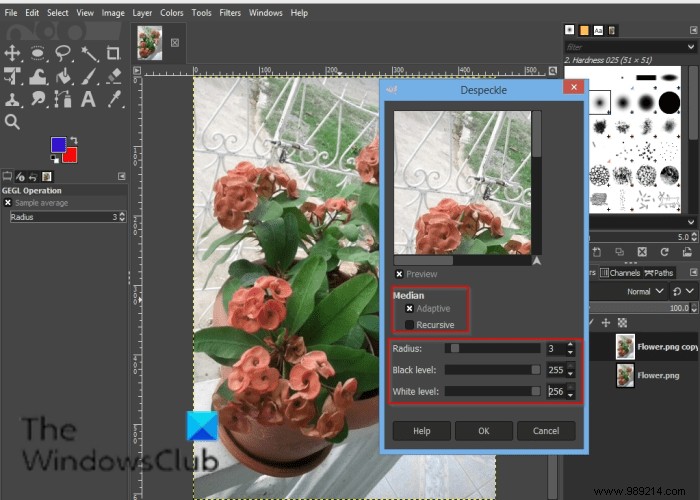
A Detach dialog box will open.
Below Median there is the Adaptive and Recursive optional.
the Adaptive The option adapts the radius to the content of the image or selection by analyzing the histogram of the region around the target pixel. The adapted radius will always be equal to or less than the specified radius.
the Recursive The option repeats the action of the filter, which becomes stronger.
the Radius sets the size of the action window from 1 to 20. This window moves over the image, and the color becomes smooth and eliminates imperfections.
the The black The level includes only pixels brighter than the value set in the histogram.
the white level only includes pixels darker than the value set in the histogram.
The purpose of the Destripe filter is to remove vertical banding caused by poor quality scanners
Open image.
Click on Filter in the menu bar, hover over Enhance and select the Peel effect.
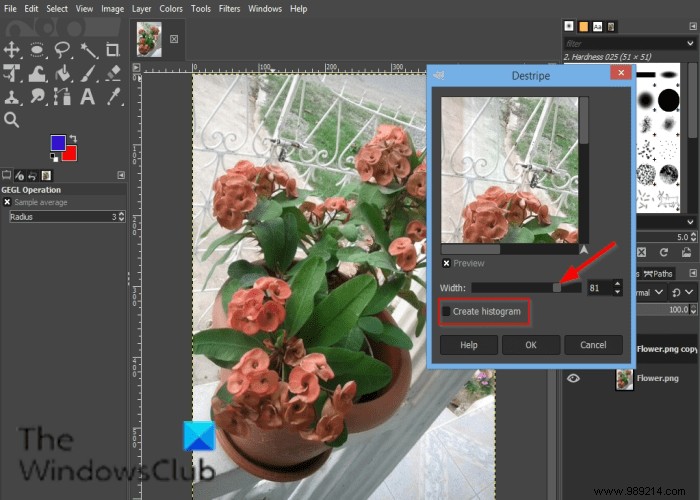
the Histogram is a black and white image showing the interference pattern more legibly.
the Width slider and input box allow users to set the "strength" of the filter.
The NL (non-linear) filter joins the smoothing, spot removal and sharpening functions. It works on the whole layer, not on the selection.
Open image.
Click on Filter in the menu bar, hover over Enhance and select the NL Effect .
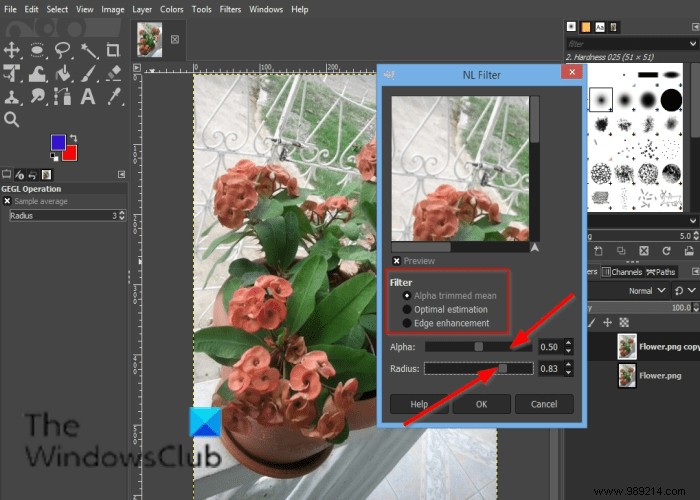
A NL Dialog will open.
Below Filter you have three modes, namely:Alpha cut means , Optimal estimate and Edge enhancement .
the Alpha filter removes pop or noise from a single pixel in an image without spreading noise or staining image features.
the Optimal Estimation adaptively applies a smoothing filter to the image.
the Edge enhancement improves edges.
the Alpha the slider and input boxes control the amount of filter to apply.
the Radius The slider controls the size of the effective sampling region around each pixel.
The wavelet decomposition filter decomposes the active layer or selection into several layers called ‘Balance ‘ each of them containing a particular set of details.
Open image.
Click on Filter in the menu bar, hover over Enhance and select the Wavelet decomposition effect.
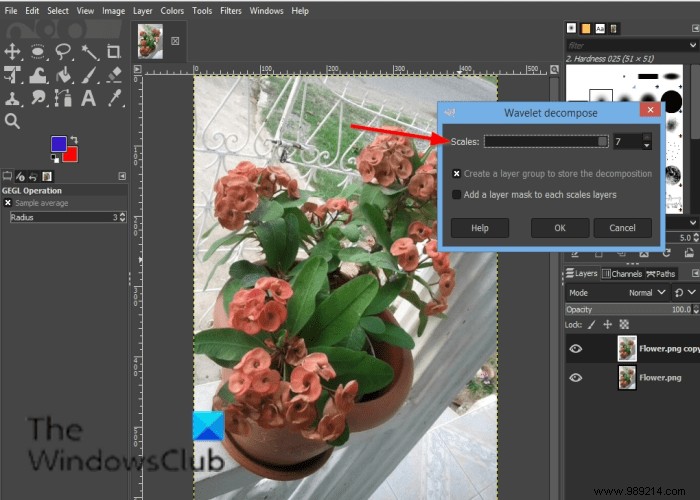
A Wavelet decomposition dialog box will open.
You can use the Escalate slider or input box to increase the fitness of the scale.
We hope this tutorial will help you understand how to use Enhance filters in GIMP.
If you have any questions about the tutorial, let us know in the comments.