Although rare, sometimes you will need to reset your CMOS. CMOS, also known as Complementary Metal-Oxide-Semiconductor, is a small piece of memory used to store your computer's BIOS or UEFI configuration. This configuration controls what your computer does on startup.
ContentsReset your CMOS with a case buttonReset your CMOS with a motherboard buttonReset your CMOS by reseating the CMOS batteryReset your CMOS with the motherboard jumperIf you've messed up your BIOS with a failed overclocking setup, changed the wrong BIOS settings, or your machine isn't booting properly, reverting the BIOS or UEFI to factory defaults can often solving the problems. Sometimes even a virus can corrupt your BIOS. You will lose any custom BIOS configurations during a reset, but these can usually be easily reset. If you have a particularly complicated setup, you can often back up your working UEFI settings and restore them later. You may not have one now, but it's a good procedure for the future.
If you built your own computer, it should be easy to reset your CMOS. Pre-built systems can be a little pickier, but you can usually use one of the methods below for yourself.
Note :For brevity and acknowledgment, we will use the term "BIOS" below to refer to UEFI and BIOS firmware.
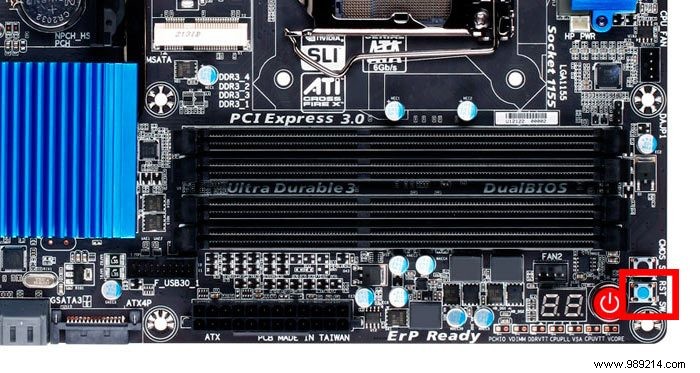
If you see a button on your computer case labeled "Erase" or "Reset", this will reset your CMOS. This is the easiest method, but it does not apply to all computers.
1. Shut down your computer.
2. Unplug your computer from the wall outlet. You can unplug the power supply from the back of your power supply or from the wall outlet.
3. Locate the case button labeled "Erase" or "Reset". It's usually next to or near the power button.

5. Press and hold the button for five to ten seconds with your finger or the eraser of a pencil. If you use your finger, be sure to ground yourself by tapping on a bare metal surface (door handles are awesome) before touching anything inside your computer.
6. Reconnect your computer to power and restart.
7. Press the correct key to enter your BIOS options.
8. Adjust your BIOS options if necessary.
If you have no other way to reset your CMOS, you can erase the saved settings by removing the CMOS battery. This battery allows the CMOS volatile memory to remain powered even when the computer is unplugged from an outlet. Removing and replacing the battery will clear the CMOS, forcing a reset.
1. Shut down your computer.
2. Unplug your computer from the wall outlet.
3. Press the power button several times to clear all capacitors.
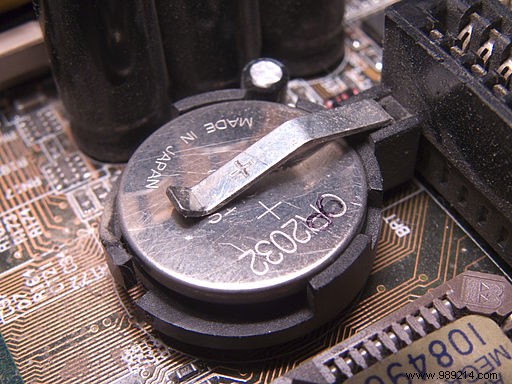
4. Find the CMOS battery on your motherboard. This is most commonly a CR2032 battery, a button cell as shown below. You'll find it near the PCI Express slots on most motherboards. Consult your motherboard manual for its exact location.

5. Carefully remove the CMOS battery. If attached by a metal clip, slide the battery out of the clip. Be careful not to bend the clip.
6. Wait a few minutes, then replace the CMOS battery.
7. Restart your computer.
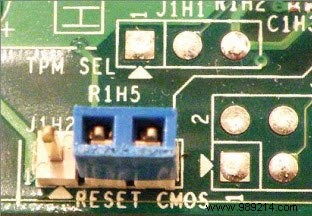
By manually adjusting the right jumper, you can trigger the CMOS clear function.
1. Shut down your computer.
2. Unplug your computer from the wall outlet.
3. Press the power button several times to clear all capacitors.
4. Open your computer case and locate the CMOS clear pins. This will usually be a two or three pin configuration mounted on the motherboard labeled "CLEAR", "RESET", or even "CLRPWD" to "clear password".

5. On a three-pin configuration with a shared center pin, move the plastic jumper to connect the center pin and the previously disconnected pin. For a two-pin configuration, remove the jumper completely.
6. Wait a few minutes, then return the jumper to its original configuration.
7. Restart your computer.
You will be able to reset your CMOS using one of the above methods. Let us know if it works for you. Once everything is working, take the time to optimize your BIOS settings.